警告
本文最后更新于 2021-12-26,文中内容可能已过时。
使用一些简单的 shell 脚本处理自己的 hugo 博客和搜索
1 config.toml 配置
1.1 首先我们配置好 config.toml 的 algolia 的配置
 1
 2
 3
 4
 5
 6
 7
 8
 9
10
11
12
13
14
15
16
17
18
19
20
21
|
# 搜索配置
[languages.zh-cn.params.search]
enable = true
# 搜索引擎的类型 ("lunr", "algolia")
type = "algolia"
# 文章内容最长索引长度
contentLength = 4000
# 搜索框的占位提示语
placeholder = "搜索"
# 最大结果数目
maxResultLength = 10
# 结果内容片段长度
snippetLength = 50
# 搜索结果中高亮部分的 HTML 标签
highlightTag = "em"
# 是否在搜索索引中使用基于 baseURL 的绝对路径
absoluteURL = true
[languages.zh-cn.params.search.algolia]
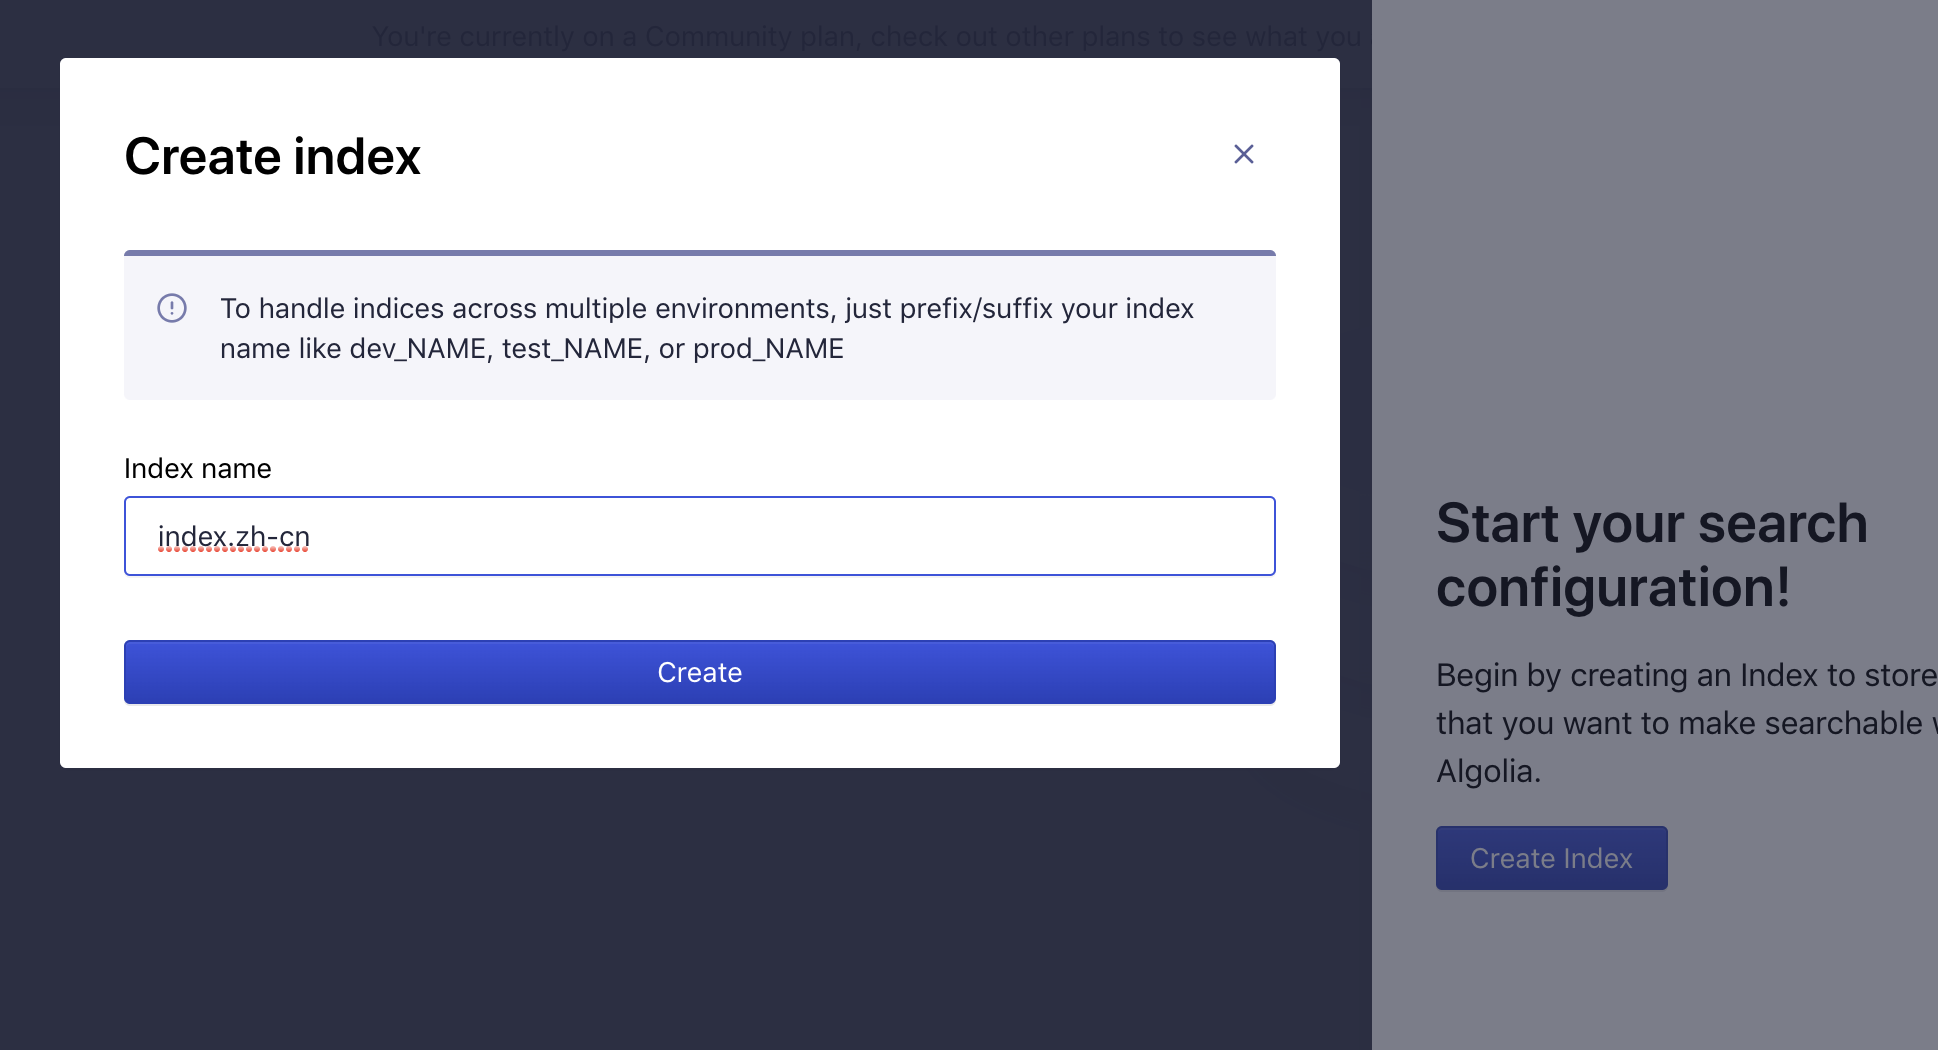
index = "index.zh-cn" #algolia 里面的 index 名称相对应,如果你有多语言版本,那么就需要创建多个语言的 index,我这里仅举例中文的版本
appID = ""
searchKey = ""
|
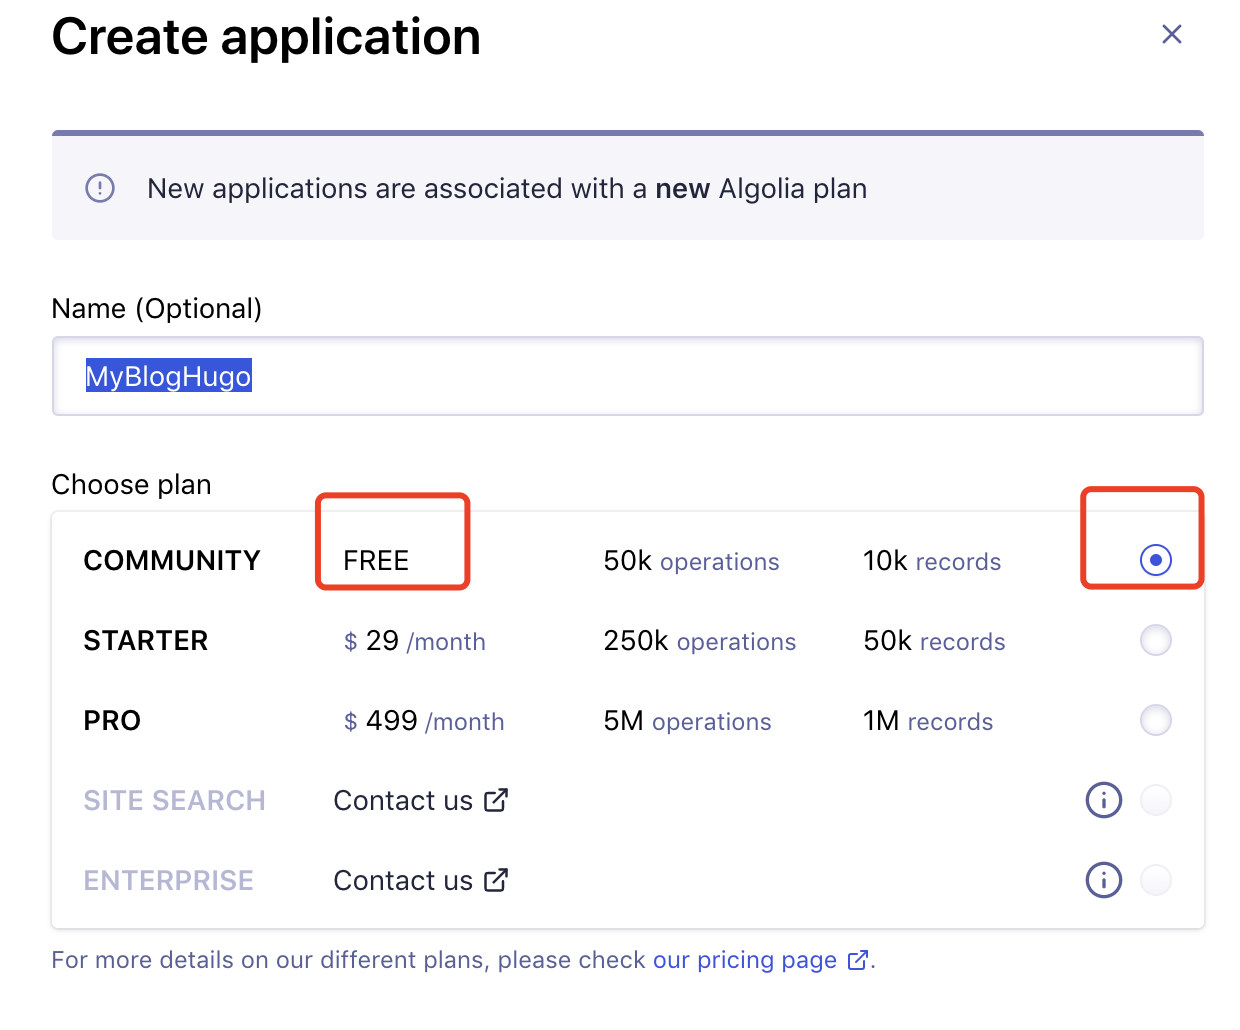
2 Algolia 配置
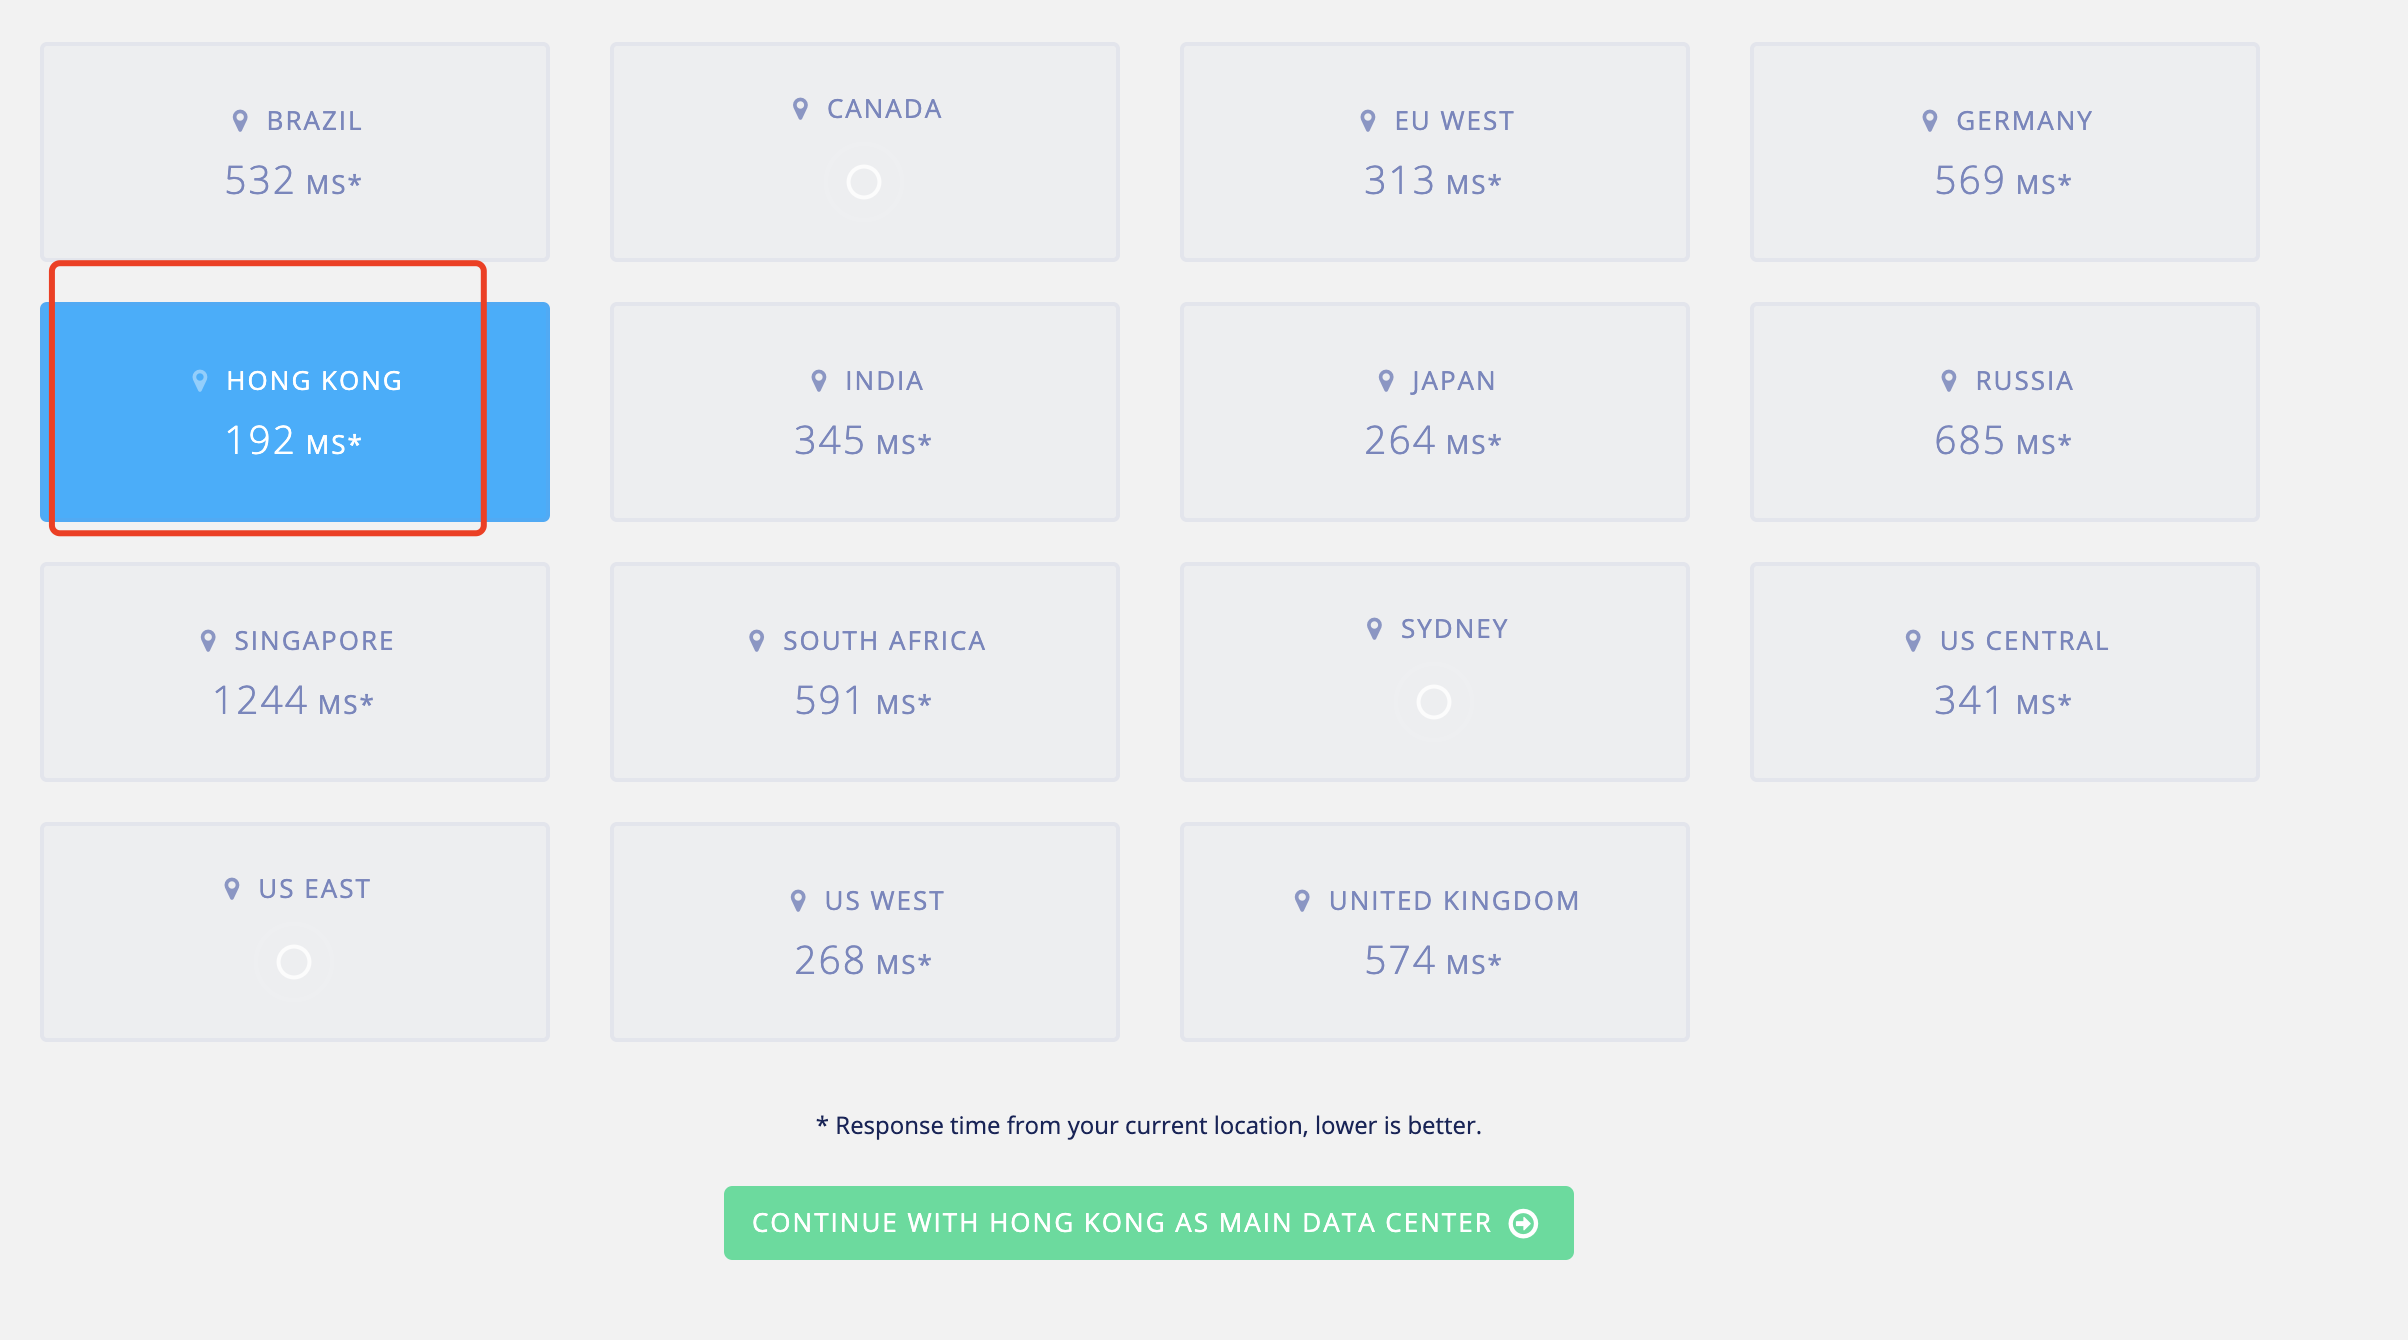
2.2 我这里选择香港作为存储地区
2.3 创建index,要与config.toml 的配置 index 一样
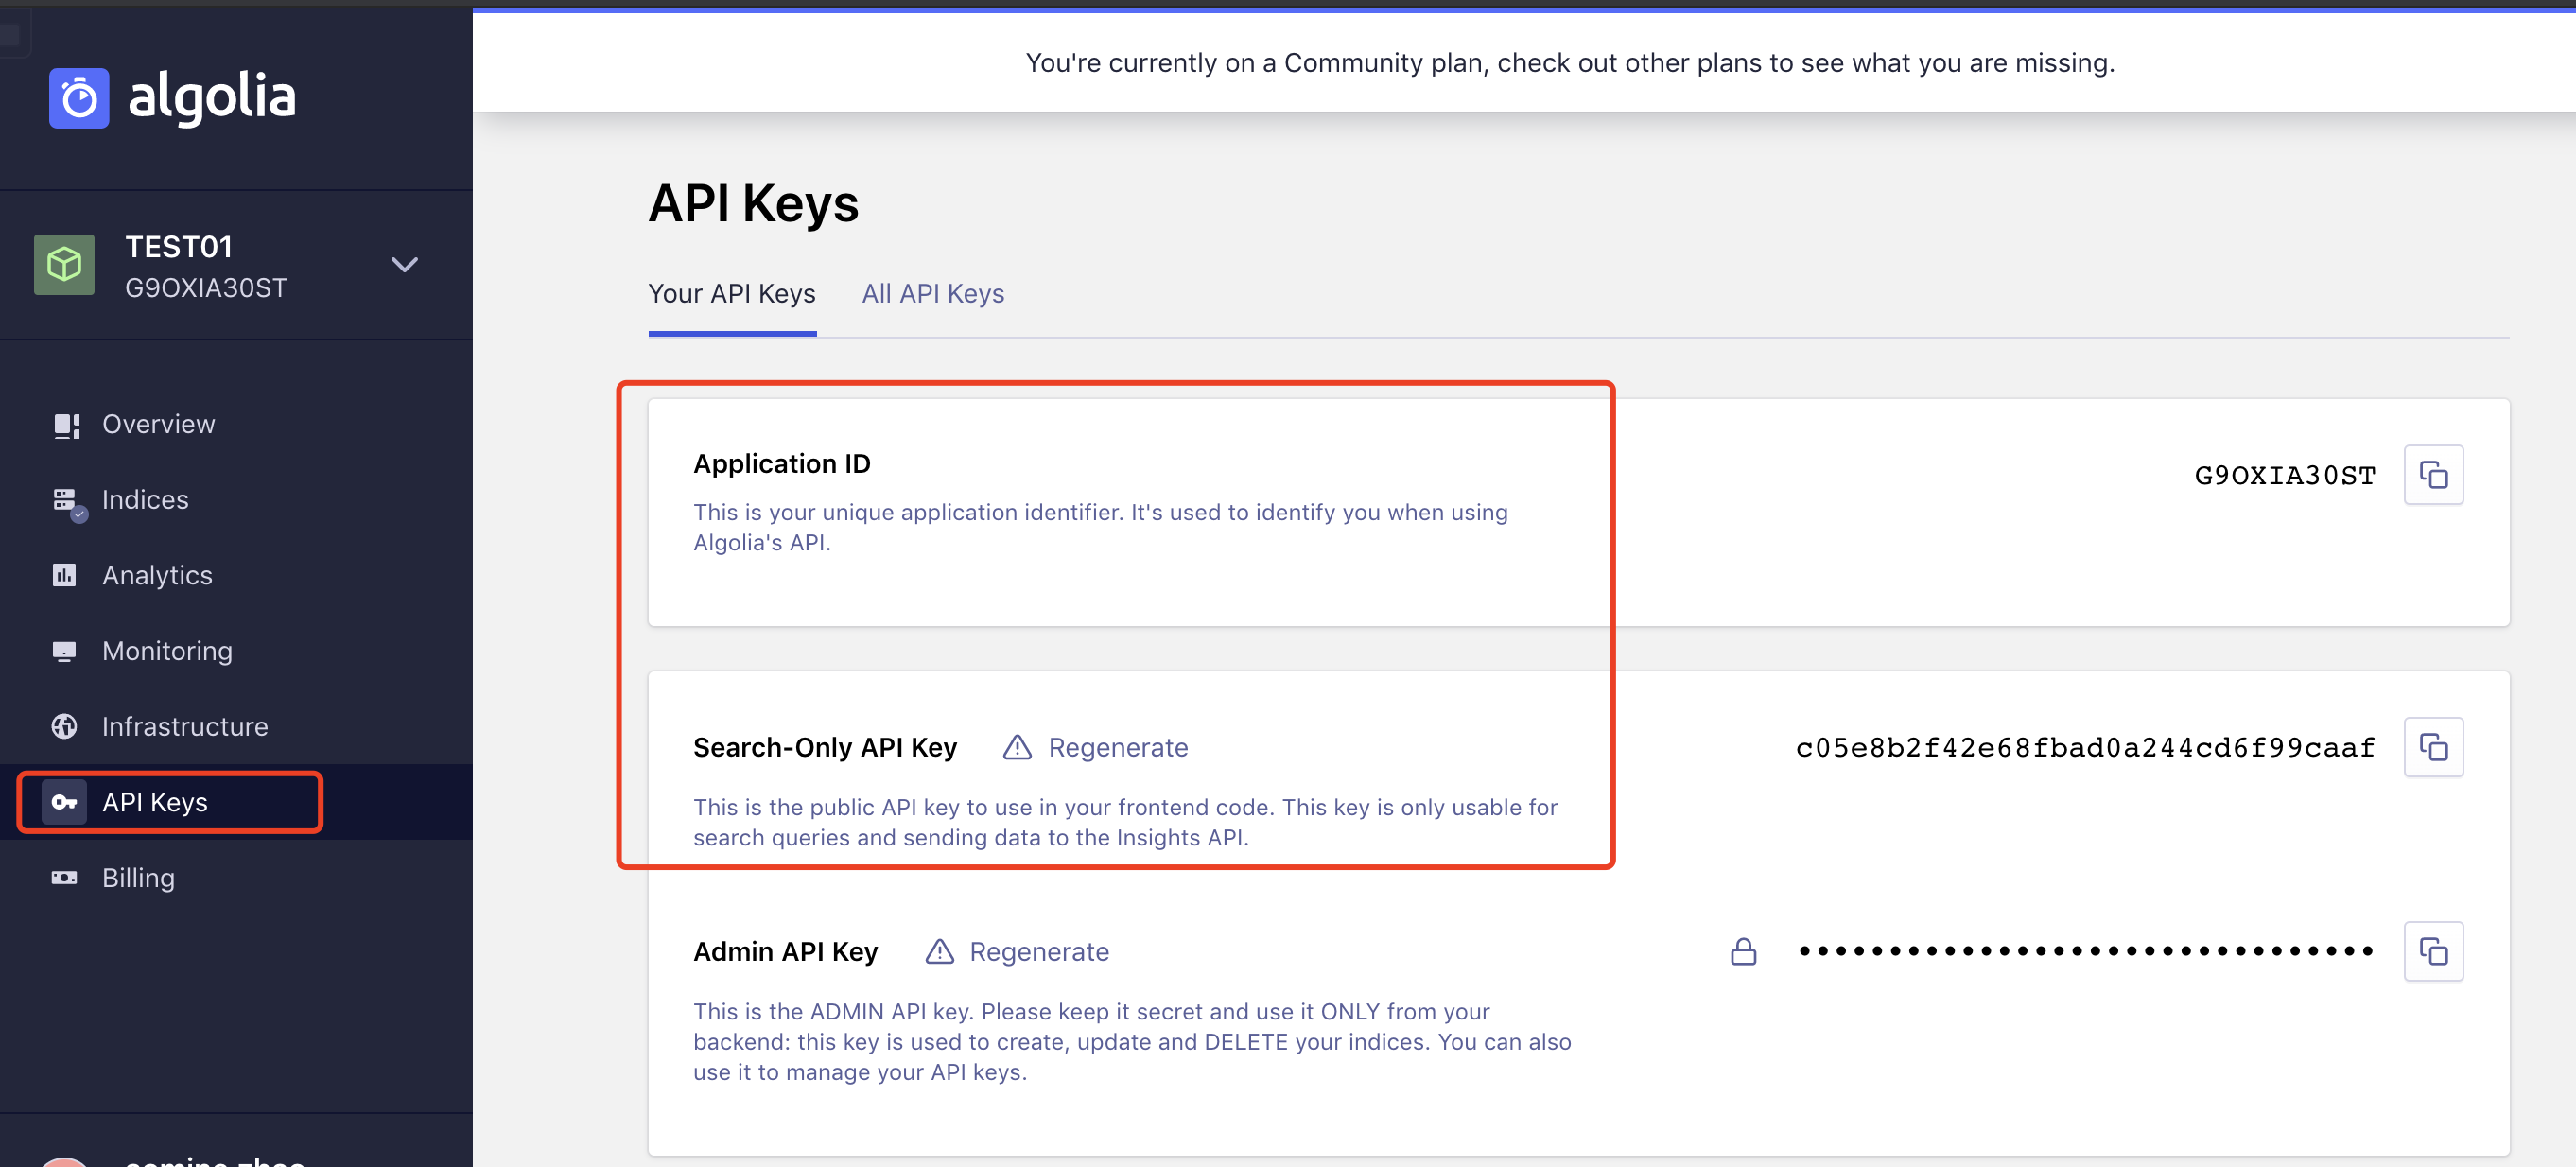
2.4 将 API Keys 里面补充到 config.toml 里面
2.5 如何删除不需要的APP
2.5.1 找到设置界面

2.5.2 进入 Applications 配置,点击 小三点进行删除

3.1 首先安装 npm,这里不介绍
3.2 安装 atomic-algolia
1
|
npm -g install atomic-algolia
|
3.3 创建 .env 文件存放 algolia 配置
注意:只有执行hugo 生成静态文件,才会在 public 目录生成index.json 索引。
1
2
3
4
|
ALGOLIA_APP_ID="8GC6CRN3M8"
ALGOLIA_ADMIN_KEY="d4467e8c57c2b12f53da9c8ec1c629be"
ALGOLIA_INDEX_NAME="index.zh-cn"
ALGOLIA_INDEX_FILE="public/index.json"
|
3.4 创建 push_algolia_json.js 脚本
 1
 2
 3
 4
 5
 6
 7
 8
 9
10
11
12
|
var atomicalgolia = require("atomic-algolia")
var indexName = process.env.ALGOLIA_INDEX_NAME
var indexPath = process.env.ALGOLIA_INDEX_FILE

var cb = function(error, result) {
    if (error) throw error

    console.log(result)
}

atomicalgolia(indexName, indexPath, cb)
|
3.5 手动执行将索引到 algolia
1
2
|
source .env
node push_algolia_json.js
|
4 定制化脚本
 1
 2
 3
 4
 5
 6
 7
 8
 9
10
11
12
13
14
15
16
17
18
19
20
21
22
23
24
25
26
27
28
29
30
31
32
33
34
35
36
37
38
39
40
41
42
43
44
45
46
47
48
49
50
51
52
53
54
55
56
57
58
59
60
61
62
63
64
65
66
67
68
69
70
71
72
73
74
75
76
77
78
79
80
81
82
83
84
|
#!/bin/sh

# If a command fails then the deploy stops
set -e

start_local_hugo_server(){
	hugo server --disableFastRender
}

update_algolia(){
	cd ../

	type=`cat config.toml|grep -A 5 "languages.zh-cn.params.search"|grep type|awk -F'"' '{print $2}'`

	if [ "$type" == "algolia" ];then
		source .env
		node push_algolia_json.js
		printf "\033[0;32m已经更新到 algolia !!!\033[0m\n"
	fi
}

pushMyBlogHugo(){
	printf "\033[0;32mDeploying updates to GitHub "https://github.com/ZhaoUncle/MyBlogHugo"\033[0m\n"
	git pull
	# Add changes to git.
	git add .

	# Commit changes.
	msg="change MyBlogHugo site $(date)"

	if [ "$#" -gt 1 ]; then
		msg="$2"
	fi
	git commit -m "$msg"

	# Push source and build repos.
	git push origin master
}

push_zhaouncle(){
	printf "\033[0;32mDeploying updates to GitHub "https://github.com/ZhaoUncle/zhaouncle.github.io"\033[0m\n"
		# Build the project.
	hugo  # if using a theme, replace with `hugo -t <YOURTHEME>`

	# Go To Public folder
	cd public
	git pull
	# Add changes to git.
	git add .

	# Commit changes.
	msg="rebuilding site $(date)"

	if [  "$#" -gt 1 ]; then

		msg="$2"
	fi

	git commit -m "$msg"

	# Push source and build repos.
	git push origin master

	update_algolia

}

case $1 in
	1)
		start_local_hugo_server
    ;;
	2)
		pushMyBlogHugo	$*
    ;;
    3)
		push_zhaouncle $*
    ;;
	4)
		hugo serve -e production
	;;
	5)
		hugo server --source=themes/LoveIt/exampleSite
	;;
esac
|
脚本解析:
sh deploy.sh 1:启动 hugo 作为本地调试使用,实时将文章的内容更新到站点,不需要重启也能边修改边观看效果。
sh deploy.sh 2:将 MyHugoBlog 上传到 Github 存储库。
sh deploy.sh 3:将 public 静态文件站点上传到Github Pages 存储库,并更新 algolia 的索引。
sh deploy.sh 4:主要是用来调试 cdn,评论系统等,所以要用 production 变量来启动。
sh deploy.sh 5:查看官方例子,方便调试。

